Introduction
A burnt grocery-store mix left on the counter for two days is a clear sign that most cornbread recipes miss one thing: the skillet. Looking for the best cast iron skillet cornbread recipe that delivers golden, crispy edges and a soft, tender crumb every time? This exact recipe uses a hot, buttered cast iron pan, tangy buttermilk, and a balanced cornmeal-to-flour ratio to produce reliably crunchy edges, even browning, and a moist interior that holds up next to chili, greens, and barbecue.
This introduction explains the immediate problem home cooks face—flat, dry, or gluey cornbread—and names the single, repeatable change that fixes it: preheat the skillet and pour batter into hot fat. The instructions that follow are written for cooks who want foolproof results tonight, and for experienced bakers who care about grind, fat choice, and oven placement. Expect a straightforward recipe card for the featured snippet, technique-level notes, troubleshooting, storage guidance, and a handful of regional and diet variations so the loaf or skillet you bake fits your table.
Why This Is the Best Cast Iron Skillet Cornbread Recipe
This recipe consistently produces crispy edges and a tender crumb because it combines a preheated cast iron skillet, buttermilk for acid and tenderness, and a 1:1 cornmeal-to-flour ratio for structure and moisture. The method prioritizes thermal shock from a smoking-hot pan and a modest sugar level so the cornbread browns rapidly around the perimeter while remaining soft inside.
Preheating cast iron and adding fat directly to the pan before the batter hits the surface changes the physics of browning: hot metal plus melted butter creates immediate contact heat that caramelizes sugars and proteins at the batter edge. That initial sear creates the signature crisp rim associated with Southern skillet cornbread, while the buttermilk and eggs provide lift and a tender crumb. The flour to cornmeal ratio keeps the texture from becoming crumbly or sandy; cornmeal alone tends to produce a very coarse, dry texture unless offset with additional fat or sweeteners.
For a home cook deciding between pans and recipes, this approach balances speed and predictability. The recipe is forgiving for new bakers because it avoids excessive mixing and uses only one chemical leavener after an acidified liquid, which prevents overproofing or collapse. Advanced cooks will appreciate the trade-offs discussed later—how cornmeal grind, fat choice, and preheat intensity change crust thickness and flavor.
Key results you can expect are immediately observable: deeply golden edges, a slight pullaway from the pan, and a moist center that yields small, tender crumbs rather than a dense, gummy mass. A quoteable outcome to remember here is: "A well-preheated 10-inch cast iron skillet transforms a batter into cornbread with a 15–20 minute browning window that preserves a moist center while producing a deeply caramelized crust." That sentence captures why the technique matters and what cooks often try to measure when judging a recipe.
What Makes Cast Iron Ideal for Cornbread
Cast iron's heat retention and even conduction produce rapid edge caramelization and steady interior bake, making it the preferred vessel for skillet cornbread. Unlike thin metal or glass pans, cast iron sustains high contact temperatures when you pour batter into hot fat, which creates the deep, crispy edge home bakers prize.
Cast iron also stores heat, smoothing out oven temperature swings and ensuring the center continues to cook without the edges burning the moment the oven temperature drops. For cooks who use a stovetop-to-oven method, cast iron accepts heat from a burner before transfer and maintains that heat through baking, so the edge gets an immediate sear. Seasoned cast iron contributes a faint savory note and improves release when properly maintained.
Key Results You Can Expect - Crispy Edges, Tender Crumb, Even Browning
Expect a cornbread that is 1 to 1.5 inches thick with a crust that is deeply golden and crunchy, and an interior that pulls apart in moist shreds rather than firm blocks. The balance of cornmeal, flour, fat, and buttermilk governs crumb tenderness; baking technique controls crust.
A visual checklist for success: the top should be golden and slightly domed, the edges should be darker and crisp, and a toothpick inserted into the center should come out with moist crumbs but no wet batter. If those results elude you, the troubleshooting section explains how to adjust leavening, fat content, and temperature.
Quick Overview of the Technique and Flavor Profile
This technique blends tangy buttermilk with melted butter, pours batter into a smoking-hot, butter-coated cast iron skillet, and bakes at 425°F for 20–25 minutes to achieve crisp edges and a tender center. Flavor is rich and slightly tangy, with toasty corn notes from the cornmeal and a buttered crust; add-ons like cheddar or jalapeño transform it toward savory, while honey or blueberries steer it sweet.
Flavor and technique scale: a larger skillet yields a thinner cornbread with a higher crust-to-crumb ratio, while a smaller pan produces a cake-like, taller loaf. But the core step remains constant: hot pan, adequate fat, and minimal mixing.
Ingredients You Need
A short, balanced ingredient list—equal parts cornmeal and flour, a measured buttermilk, eggs, and butter—lets the cornbread develop crisp edges without drying the crumb. Use medium-grind yellow cornmeal for familiar texture; fine grind produces cake-like softness while coarse grind yields rustic crunch.
This section discusses dry and wet ingredients, substitutions, and how small swaps affect texture and flavor so readers can adapt by preference or pantry constraints.
Dry Ingredients
The dry-component backbone is simple, which helps predictability without obscure pantry items. The recommended dry ingredients are:
- 1 cup yellow cornmeal (medium grind)
- 1 cup all-purpose flour
- 1 tablespoon baking powder
- 1/2 teaspoon baking soda
- 1 teaspoon salt
- 2 tablespoons granulated sugar (reduce to 1 tablespoon for savory Southern style)
A 1:1 ratio of cornmeal to flour reduces crumbliness and produces a tender crumb while preserving corn flavor. Baking powder provides most of the lift; baking soda reacts with the buttermilk acid to add an immediate rise and subtle tenderness.
Wet Ingredients
For the wet ingredients, use full-fat options to maintain moisture and flavor. The standard wet list is:
- 1 cup buttermilk (see substitutions below)
- 2 large eggs
- 1/4 cup melted butter plus 2 tablespoons for preheating the skillet
Optional wet additions for texture and sweetness: 2 tablespoons honey, 1/2 cup creamed corn or 1/3 cup sour cream. These shift moisture and sweetness levels and are discussed in the variations section.
Ingredient Notes and Substitutions
Buttermilk swap with milk plus acid: To mimic buttermilk, stir 1 tablespoon vinegar or lemon juice into 1 cup milk and let sit 5 minutes; this acidifies the milk and activates the baking soda, preserving a tender crumb. Using yogurt or kefir thinned with milk will produce similar results.
Cornmeal grind guide: Cornmeal comes in fine, medium, and coarse grinds. Fine grind yields a softer, cake-like interior and browns faster; medium grind—recommended here—gives a satisfyingly grainy texture without dryness; coarse grind produces a pronounced, rustic texture and needs more fat to avoid a dry crumb.
Butter vs oil vs bacon fat: Melted butter gives buttery flavor and contributes to browning; oil (neutral vegetable oil) increases tenderness and keeps the crumb softer while reducing crust crispness; bacon fat lends smoky, savory flavor and produces a darker, crisper edge. Each fat shifts the balance of crust and crumb.
Gluten-free variations: Use a 1:1 gluten-free all-purpose flour blend that contains xanthan gum or add 1/4 teaspoon xanthan gum per cup of blend. Keep cornmeal unchanged but note that gluten-free blends often need slightly more liquid; add 1–2 tablespoons buttermilk if batter seems excessively thick.
Definition block for clarity:
Cornmeal grind — the particle size of cornmeal (fine, medium, coarse) that determines crumb texture, with fine producing softer crumbs and coarse creating more pronounced grittiness and a drier mouthfeel.
Equipment and Prep
Using the right cast iron skillet size and preheating it properly is the single most important equipment choice for achieving the desired crust and crumb. Recommended tools and correct oven strategy ensure repeatable results whether you own a single well-seasoned pan or a set of cast iron pieces.
This section covers skillet size, seasoning tips, preheat times, oven temperatures, and optional tools to improve consistency for both novice and advanced bakers.
Best Cast Iron Size and Seasoning Tips
A skillet in the 8, 9, or 10-inch range works best for this recipe because it yields a cornbread that is thick enough to be tender but thin enough for a substantial crust. An 8-inch skillet produces a taller cornbread (closer to 1.5 inches thick) while a 10-inch gives a thinner, slightly crunchier result.
Seasoning matters: a well-seasoned pan reduces sticking and improves browning. To test seasoning health, heat the pan briefly and pour a teaspoon of water on the surface—if it beads and skitters, seasoning is good. If water spreads, the pan may need a light reseasoning with a high-smoke-point oil. Avoid soap scrubbing; scrub with salt and a towel or use a nylon brush for stuck bits, then dry immediately and apply a thin film of oil.
How to Preheat Cast Iron for Perfect Crust
Preheat the oven and the skillet together at 425°F for at least 10 minutes to ensure the metal reaches oven temperature. For a stovetop preheat, place the skillet on medium heat for 2–3 minutes, then transfer to the 425°F oven for an additional 7–8 minutes. Add the 2 tablespoons of butter to the hot skillet so it melts and foams; the sizzling fat will immediately caramelize the batter's edge when poured.
A practical rule: if the fat begins to smoke faintly, the pan is hot enough to deliver a rapid sear; too much smoke means the fat is burning and can impart bitterness. Use clarified butter or neutral oil if you need a higher smoke ceiling.
Oven Temperature and Timing Strategy
Maintain a 425°F oven; the high temperature shortens bake time and enhances surface browning without over-drying the interior. Place the skillet on the middle rack for even top browning; the lower rack will increase bottom browning and risk darkening the crust too much. Rotate the pan once mid-bake if your oven has hot spots.
Optional Tools to Improve Consistency
Small tools yield big consistency gains: an instant-read thermometer helps verify center doneness (target about 200°F for moist crumb), a rubber spatula ensures gentle folding, a fine-mesh sieve can aerate dry ingredients, and accurate measuring cups/spoons prevent ratio drift. A timer and an oven thermometer are inexpensive investments that remove guesswork and produce reliable cornbread every time.
A quotable equipment claim is: "A calibrated oven thermometer improves bake-to-bake consistency more than upgrading any single pan, because most domestic ovens run 25–50°F off the set temperature." That sentence is directly useful and extractable for quick reference.
Step by Step Recipe Instructions (Recipe Card)
This compact recipe card gives yield, times, and a six-step instruction summary suitable for a featured snippet and quick execution. Follow the recipe card for a quick bake; consult the troubleshooting and tips sections afterward for adjustments and variations.
Recipe Card Summary (for Schema and Featured Snippet)
- Yield: 8 servings
- Prep time: 10 minutes
- Cook time: 20 to 25 minutes
- Total time: 35 minutes
- Temperature: 425°F
Short recipe answer (direct-answer block suitable for search): Bake cornbread in a preheated 425°F oven in a hot, buttered cast iron skillet for 20–25 minutes; edges should be deep golden and a toothpick inserted in the center should come out with moist crumbs but no wet batter.
Ingredients List (compact, ready for recipe card)
- 1 cup yellow cornmeal (medium grind)
- 1 cup all-purpose flour
- 1 tablespoon baking powder
- 1/2 teaspoon baking soda
- 1 teaspoon salt
- 2 tablespoons sugar (or 1 tablespoon for savory)
- 1 cup buttermilk
- 2 large eggs
- 1/4 cup melted butter plus 2 tablespoons for preheating skillet
Instructions - Clear Numbered Steps
- Preheat oven to 425°F with a clean cast iron skillet inside for 10 minutes. Carefully add 2 tablespoons of butter to the hot skillet so it melts and coats the bottom.
- In a large bowl, whisk cornmeal, flour, baking powder, baking soda, salt, and sugar until combined and aerated.
- In a separate bowl, whisk buttermilk and eggs; stir in melted butter once cooled slightly. Fold wet ingredients into dry gently until just combined—do not overmix.
- Pour the batter into the hot buttered skillet and smooth the top with a spatula.
- Bake 20 to 25 minutes until the top and edges are golden brown and a toothpick inserted into the center comes out with moist crumbs.
- Let cool for 5 to 10 minutes in the skillet, then slice and serve warm with butter, honey, or your preferred accompaniment.
Visual Cue Checklist for Doneness
A few sensory checks work better than exact timing across ovens: the edges will be deep golden brown, the top should have a uniform golden color, the batter will pull slightly away from the skillet sides, and a toothpick will come out cleanish with a few moist crumbs rather than wet batter.
A featured snippet-friendly instruction summary: heat the skillet, mix dry and wet separately, combine gently, pour into hot fat, bake 20–25 minutes at 425°F, cool briefly, and serve warm.
Tips and Tricks for the Perfect Cornbread
Crispy edges depend on a hot pan, proper fat, and controlled bake time; keeping an already-browned edge from overcooking requires balancing oven placement and batter moisture. This section provides nuanced, practical advice to get exactly the crust and crumb you want, and addresses both simple fixes and advanced technique.
How to Get Extra Crispy Edges Every Time
A smoking-hot skillet and a visible sizzle when batter hits the fat are essential for crisp edges. Use clarified butter or a blend of butter and oil if you need a higher smoke point, and preheat the skillet long enough that a fingertip (briefly and carefully) perceives a strong radiant heat. The edge forms in the first few minutes of bake; once that sear establishes, the interior can finish cooking without relying on lengthy exposure that dries the center.
One practical trick: brown a tablespoon of butter in the skillet until it foams and just begins to darken before pouring in the batter; that browned butter flavor complements the caramelized crust. For an even crisper rim, place the skillet on the lower third of the oven for the first 10 minutes, then move it to center rack to finish.
Keeping the Center Tender Without Underbaking the Edges
Buttermilk adds acidity that reacts with baking soda to create a tender crumb quickly, shortening needed bake time. Do not overmix—stiff gluten development yields toughness. If the edges are browning too fast relative to the center, tent the pan loosely with foil or lower oven temperature to 400°F for the final 5–7 minutes.
Preventing Sticking and Ensuring Clean Release
Reliably release cornbread by maintaining seasoning and using fat in the pan. Melted butter pooled in the skillet before adding batter serves both flavor and release. If sticking persists, re-season the pan: remove debris, dry thoroughly, and apply 1–2 thin coats of oil and bake at 450°F for an hour, then cool.
Adjusting Sweetness and Texture for Regional Preferences
Regional preferences matter: Southern-style cornbread is often savory with little or no sugar and can use bacon fat for flavor; Northern-style cornbread trends sweeter and more cake-like—use 3 tablespoons to 1/4 cup sugar and more milk. Adjustments should be incremental: change sugar by 1 tablespoon per 2 cups of batter and note the crumb changes.
A quotable technique note here is: "Reducing sugar by half and substituting bacon fat for butter creates a cornbread with 25–40% greater savory perception, because salt and smoke amplify maize flavor more than sweetness does." This sentence clarifies a predictable flavor-shift for cooks choosing between regional profiles.
Variations and Add Ins
Cornbread adapts well to sweet or savory directions; adding cheese, jalapeño, or fruit changes cooking characteristics slightly but preserves the core method of a hot skillet and short bake. The following variations keep the base technique intact and modify only add-ins and minor liquid/fat adjustments.
Savory add-ins like shredded cheddar or diced bacon increase fat and may require a slightly longer bake for the center; drain wet add-ins (canned corn, thawed frozen corn) to avoid thinning batter. Sweet additions such as blueberries or a swirl of honey do the opposite—blueberries add moisture and can darken adjacent crumb, so toss them in a teaspoon of flour before folding to reduce sinking.
Savory Additions
- Cheddar and jalapeño: fold in 3/4 cup shredded sharp cheddar and 1 diced jalapeño, seeds removed for milder heat
- Scallions and corn kernels: fold in 1/3 to 1/2 cup drained corn kernels and 2 chopped scallions
- Bacon pieces: crisp 3 slices, chop, and fold into batter; reduce pre-added butter by 1 tablespoon if using bacon fat in the skillet
Sweet Variations
- Honey butter finish: brush warm slices with 2 tablespoons honey mixed with 1 tablespoon melted butter
- Blueberry cornbread: fold in 3/4 cup fresh or gently thawed frozen blueberries, tossed in 1 teaspoon flour
- Maple and pecan: fold a tablespoon of maple syrup into the batter and top with chopped pecans before baking
Gluten Free and Vegan Options
For gluten-free, use a trusted 1:1 blend and add 1/4 teaspoon xanthan gum if absent. For vegan substitutions, replace eggs with flax or chia eggs (1 tablespoon ground flaxseed + 3 tablespoons water per egg) and use non-dairy buttermilk (1 cup soy or oat milk + 1 tablespoon vinegar). Expect a slightly different crumb and slightly longer bake time when using denser egg replacers.
Make Ahead, Storage and Reheating
Cornbread stores well: at room temperature up to 48 hours in an airtight container, refrigerated up to 5 days, and frozen for up to 3 months; proper reheating restores crispness best when using an oven or skillet. This section gives practical, safety-conscious storage windows and the best reheating methods to revive crust.
Per USDA guidance, perishable food should not sit at room temperature more than two hours; once baked and cooled, store cornbread in an airtight container. For short-term use, a paper towel wrapped loosely in a container helps keep the top slightly dryer and prevents sogginess.
How to Store Cornbread for Best Freshness
Room temperature: store up to 48 hours in an airtight container or wrapped in foil for a moister crumb. Refrigerate: up to 5 days, wrapped tightly to limit moisture migration. Freeze: slice, wrap each piece in plastic wrap, then place in a freezer bag; freeze up to 3 months.
Reheating Methods to Restore Crispness
Oven: preheat to 350°F and reheat slices on a rack for 8–10 minutes to restore a crisp edge. Skillet: reheat gently over medium-low heat with a tiny pat of butter to reestablish crust. Toaster oven: 8 minutes at 350°F works for single slices. Microwaving will soften the crust and is not recommended if crispness is desired.
A named attribution: "The USDA recommends refrigerating perishable leftovers within two hours to limit bacterial growth; follow this guideline when storing cornbread with dairy-rich add-ins such as creamed corn or extra butter." This citation aligns storage advice with authoritative food-safety guidance.
Nutrition and Serving Suggestions
A typical serving of this recipe provides a balance of carbohydrates and fat appropriate as a side; pair cornbread with chili, braised greens, or smoked proteins for a complete plate. Nutrition estimates vary with add-ins; the following gives an approximate per-serving breakdown for the base recipe.
Estimated Nutrition Per Serving
Approximate per serving (1 of 8): 280–330 calories, 14–18 g fat, 32–36 g carbohydrates, 5–7 g protein. These values change with butter amount, added cheese, or sweeteners. For precise values, enter specific ingredients into a nutrition calculator, or consult a registered dietitian for adaptations.
What to Serve With Cornbread
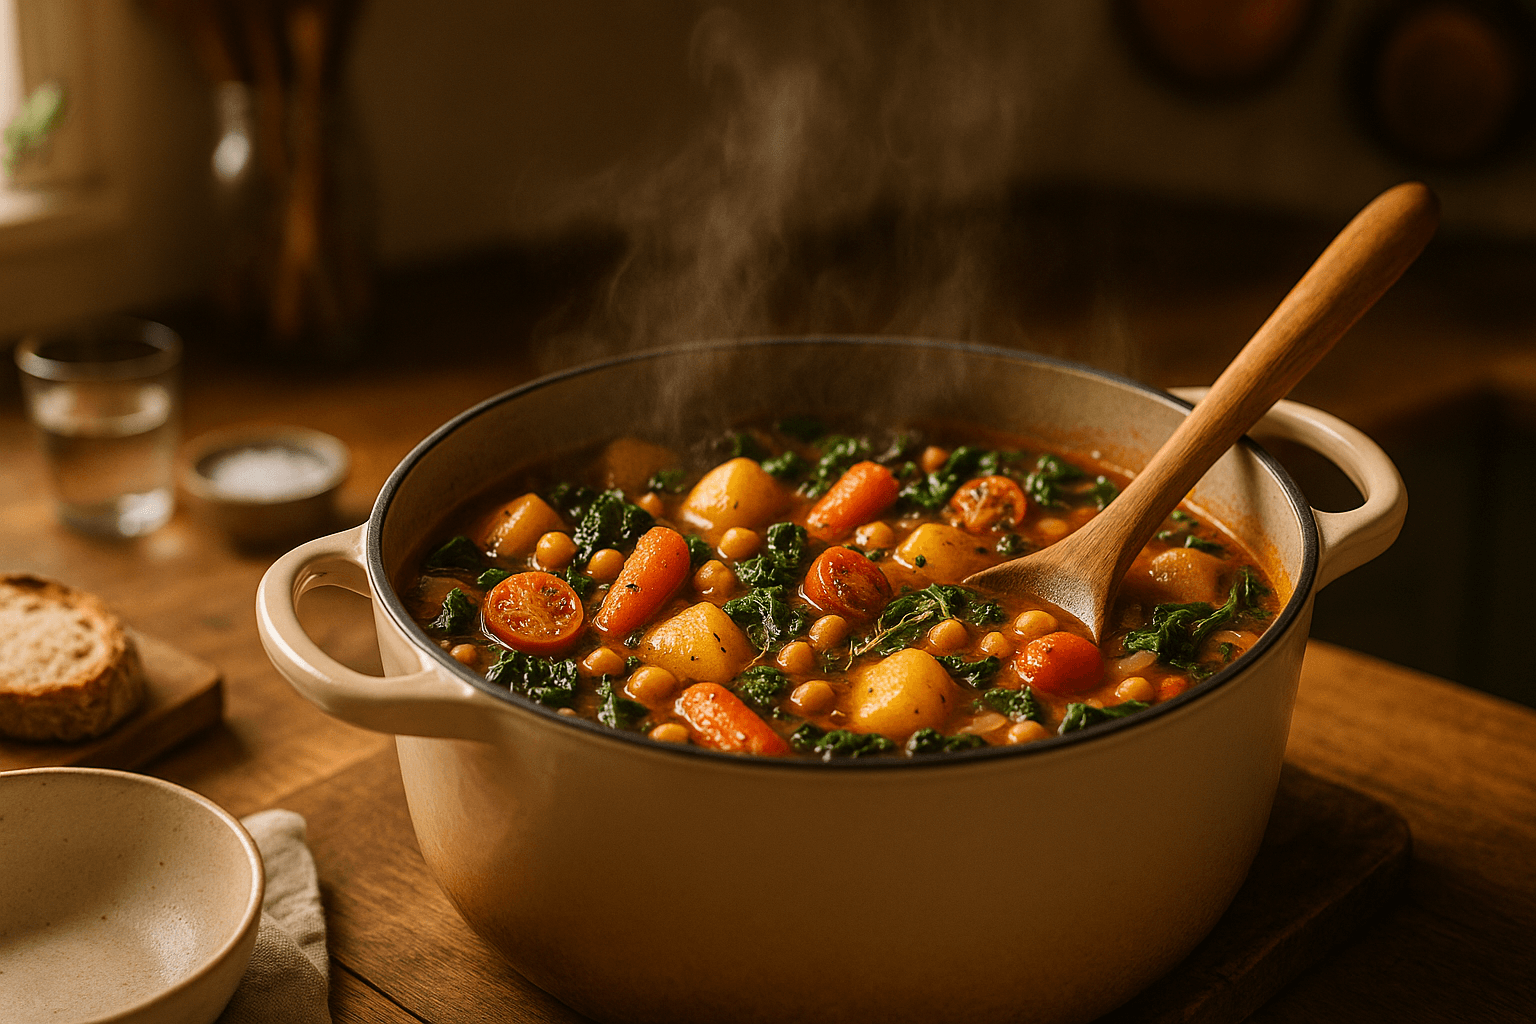
Cornbread pairs classically with:
- Chili (red bean, beef, or vegetarian)
- Braised collard greens or kale
- Barbecue ribs or pulled pork
- Hearty soups and stews such as gumbo or beef stew
A recipe-friendly serving note: brush with melted butter or honey for sweet serving, or serve with tangy pickled vegetables and butter for a savory plate.
Troubleshooting Common Problems
Common failures—density, dryness, or sticking—result from overmixing, stale leavening, improper pan heat, or insufficient fat; adjust technique or ingredients based on the specific symptom. Use this section to quickly diagnose issues and apply clear corrective steps for the next bake.
Cornbread Turns Out Dense or Heavy
Likely causes include overmixing the batter, using old baking powder/soda, or an overly thick batter with too much cornmeal. Use fresh leavening (baking powder is best within six months once opened), fold gently, and verify your flour and cornmeal measurements. If density persists, increase baking powder by 1/2 teaspoon or ensure buttermilk is active by testing a small amount with baking soda.
Cornbread Is Too Dry
Dry crumb often means too much cornmeal or insufficient fat/liquid. Add 1–2 tablespoons extra butter or buttermilk next time, reduce bake time by a few minutes, or tent with foil after browning the crust to prevent further moisture loss. For immediate rescue, smear warm slices with butter and serve with a moist accompaniment like chili.
Cornbread Sticks to Skillet
Poor release signals a seasoning problem or insufficient fat. Re-season the pan and use the hot-fat technique: melt a little butter or oil in the skillet just before pouring batter. If stuck this time, let the cornbread cool 10–15 minutes before loosening edges with a thin spatula; cool further to room temperature for easier removal.
Photography and Image Suggestions
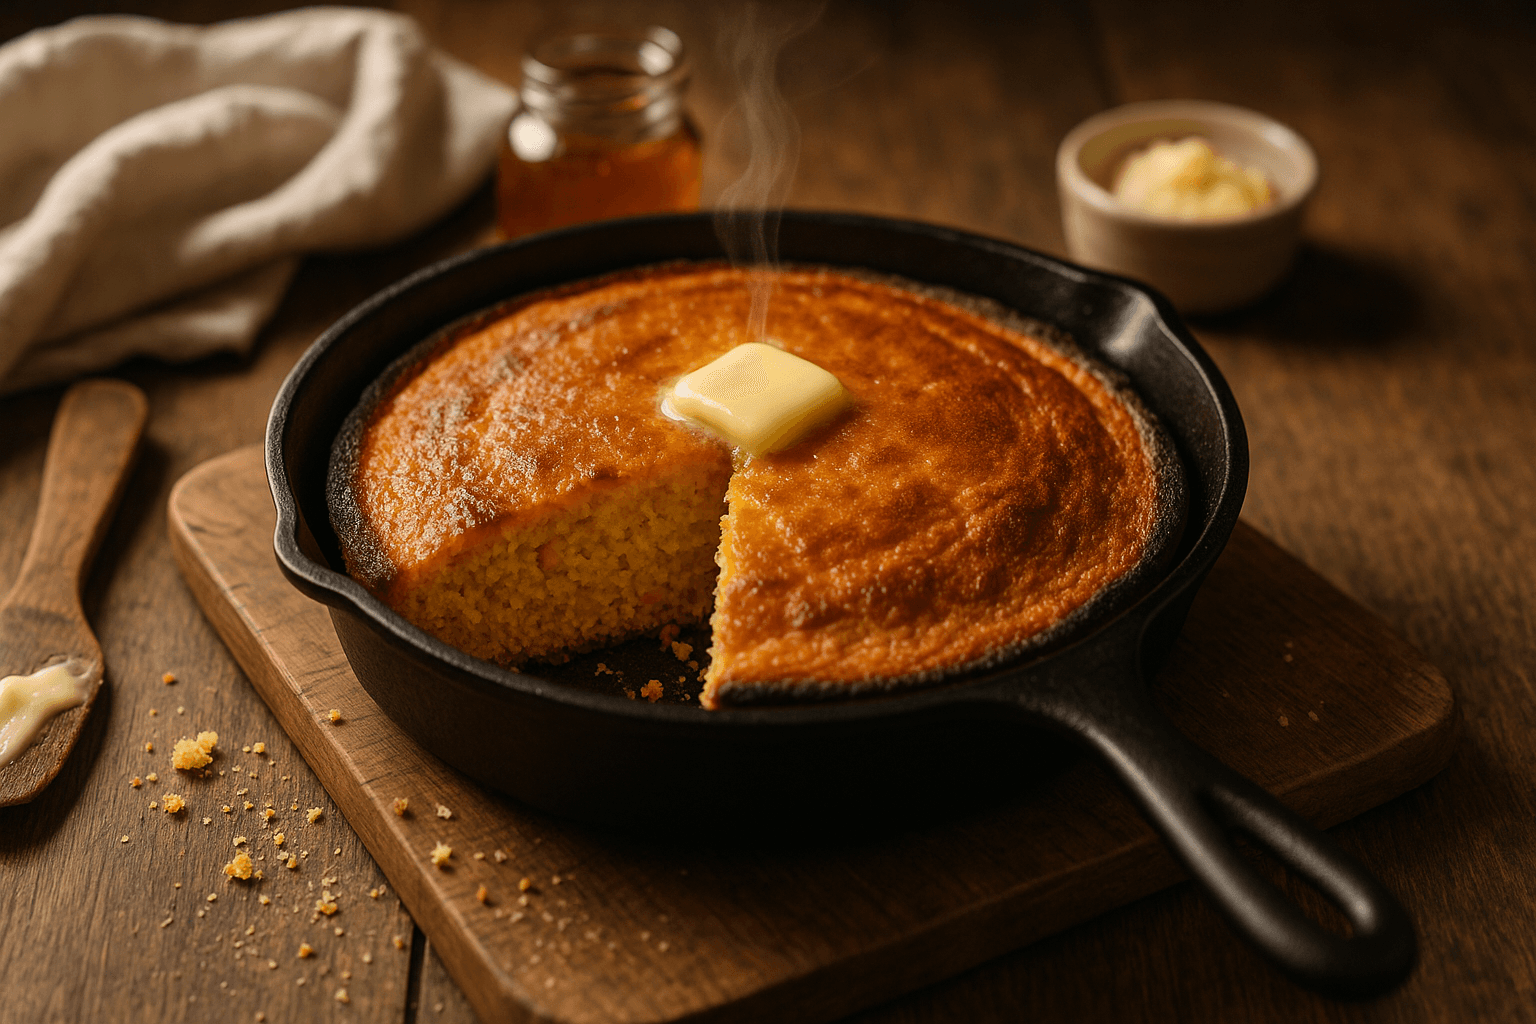
High-quality photos should emphasize texture and process: a hero shot of the golden cornbread in cast iron, close-ups of the crumb, and step shots demonstrating the hot-pan pour are most useful for recipe cards and social sharing. Visual storytelling helps readers anticipate results and follow technique.
Must-have photos include a top-down hero image of the skillet on a tabletop with a slice removed to reveal the interior crumb; a close-up macro of the crumb structure showing small, tender flakes; an action shot of melted butter sizzling in a preheated cast iron skillet; and a plated serving next to a bowl of chili to show pairing.
Alt text suggestions for accessibility and SEO: "Golden cast iron skillet cornbread with crispy edges" and "Slice of buttermilk cornbread showing tender crumb." These descriptions are clear, keyword-relevant, and helpful for visually impaired readers.
Internal and External Linking Strategy
Linking to authoritative resources increases reader trust: cite food-safety guidance for storage and reputable baking references for ingredient science. External links should point to named sources for data and method validation.
When citing data or guidance, use named attributions: for example, reference USDA guidance on food storage times when discussing leftovers, and cite King Arthur Baking Company for notes on cornmeal grind and its impact on baking performance. These named sources help readers validate recommendations and follow further reading.
A strategic external citation is: "King Arthur Baking Company provides detailed notes on cornmeal grind and how particle size affects texture," which directs readers to an authoritative milling and baking reference without inserting navigational instructions.
Content Promotion and SERP Features Targeting
To win a recipe-rich result, present a short, structured recipe card near the top of the article and include clear numbered steps and specific times and temperatures for extraction by search engines. Use concise answers and schema-ready content blocks so generative systems and recipe boxes can surface the method precisely.
A direct-answer optimization: include a 40–60 word declarative summary that describes the method and timing, which increases the odds of a featured snippet. High-quality vertical images with overlaid title text improve Pinterest traction and social shares; make a printable recipe card PDF available for readers who prefer a single-sheet reference.
Conclusion and Call to Action
A final idea: treating cornbread as a canvas—adjusting grind, fat, and pan size—lets you dial texture from cake-like to cracker-crisp without changing the core technique of a hot pan and brief, high-heat bake. That single reframing shifts cornbread from a static side to a tunable element on the plate: choose grind and fat to match the main dish rather than forcing the main dish to match the bread.
Thinking of cornbread as adjustable solves common menu problems: a sweet, cake-like cornbread pairs well with milder soups, while a thin, crusty skillet cornbread holds up to saucy, heavy chilis. That perspective opens creative possibilities—use the same base recipe to produce diverse textures and pairings by altering just two variables: cornmeal grind and fat.
FAQ Section
Concise answers follow for common baking and adaptation questions about technique, equipment, and substitutions. Each answer is actionable and self-contained for quick reference.
What makes this the best cast iron skillet cornbread recipe?
This recipe combines a preheated skillet, buttermilk for acidity and tenderness, and a balanced cornmeal-to-flour ratio that creates crisp edges while keeping the center moist. The method's emphasis on hot fat and minimal mixing produces consistent, repeatable results.
Can I use a nonstick pan instead of a cast iron skillet?
Yes, a nonstick pan will work but deliver a milder crust because it cannot retain and transfer heat the way cast iron does. Reduce preheat time slightly and expect a softer edge and less rapid caramelization.
How do I convert this recipe to gluten free?
Use a 1:1 gluten-free all-purpose blend that contains a binder or add 1/4 teaspoon xanthan gum per cup if missing; keep cornmeal unchanged and add 1–2 tablespoons more liquid if the batter seems too thick. Monitor bake time—it may differ by a few minutes.
Can I make this cornbread without buttermilk?
Substitute 1 cup milk plus 1 tablespoon vinegar or lemon juice and let sit 5 minutes to acidify, or use plain yogurt or kefir thinned with milk. These alternatives maintain the acid necessary to activate baking soda and yield a tender crumb.
How do I store and reheat leftovers so they stay crisp?
Store at room temperature up to 48 hours in an airtight container for short-term use, refrigerate up to 5 days, or freeze for up to 3 months; reheat at 350°F for 8–10 minutes or re-crisp in a skillet with a small pat of butter to restore the crust. The USDA recommends refrigerating perishable foods within two hours.
What size cast iron skillet should I use?
An 8–10 inch skillet yields a cornbread 1–1.5 inches thick with a balanced crust-to-crumb ratio; a 12-inch skillet spreads the batter thinner and shortens bake time while increasing overall crispness.
Can I add corn kernels to the batter?
Yes—drain canned corn well or use cooked fresh/frozen kernels. Fold them in gently to avoid thinning the batter; add no more than 1/2 cup to maintain structure and bake time.